In this post I quickly go through 3 best practices you should know before you start using Talend. They might seem a bit abstract at first, but they will save you a lot of time in the (not so) long run.

I don’t present anything original in this post. But, as I already explained it to a couple of persons, I thought it might worth it to write it down.
#1 – Context variables
Talend jobs often share variables among them, and these variables are likely to change when you switch environment. For instance, some of your jobs might require to read files stored on the disk. In your local environment, these files will be located at /home/your-machine/input-folder/. In the production environment, the path will look like /home/remote-machine/etl-input-folder/. Instead of adapting your jobs every time you switch environments, context variables will help you handle this situation.
It’s easy to create context variables: in the Repository panel, right-click on Contexts and choose Create context group.
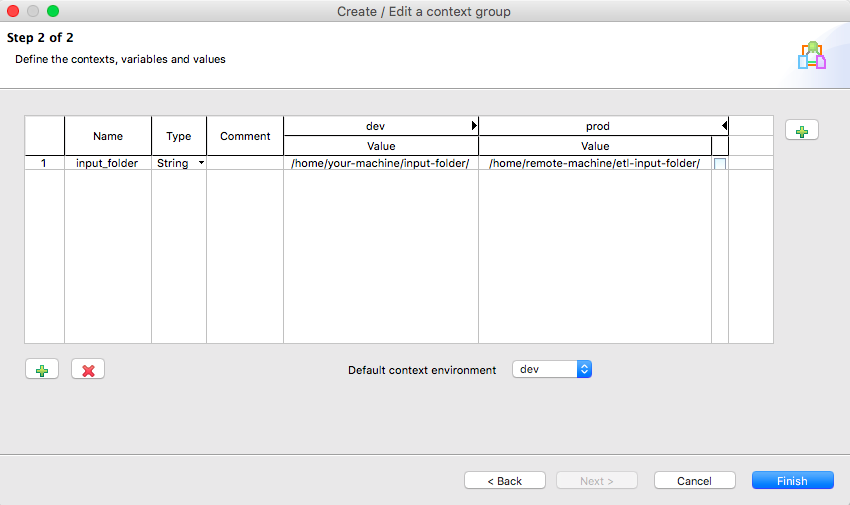
New contexts can be created by clicking on ![]() on the right-hand side of the panel. I recommend to create at least two: dev (your local machine) and prod (the machine on which jobs will be deployed).
on the right-hand side of the panel. I recommend to create at least two: dev (your local machine) and prod (the machine on which jobs will be deployed).
The ![]() and
and ![]() buttons at the bottom allow the creation and deletion of variables. In this example, the variable input_folder is created. A distinct value is assigned in each context. When the job in executed
buttons at the bottom allow the creation and deletion of variables. In this example, the variable input_folder is created. A distinct value is assigned in each context. When the job in executed
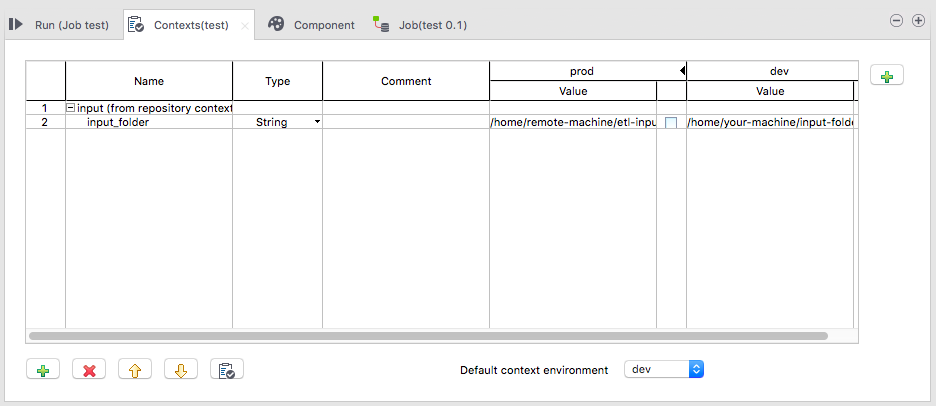
When creating a job, you can access these variables by clicking on the button ![]() .
.
You will find more detailed explanations on MindMajix.com, VikramTakkar.com, DiethardSteiner.blogspot.fr.
#2 – Logs and stats
Keeping logs and stats is key when deploying jobs in production. They help find out what happened when an anomaly is detected, or simply check when jobs started and ended.
To configure your jobs properly, go to: File > Edit Project properties > Job Settings > Stats & Logs. Then tick Use statistics and Use logs. In this example, we’ll consider the data will be stored in files (that’s why On Files is ticked).
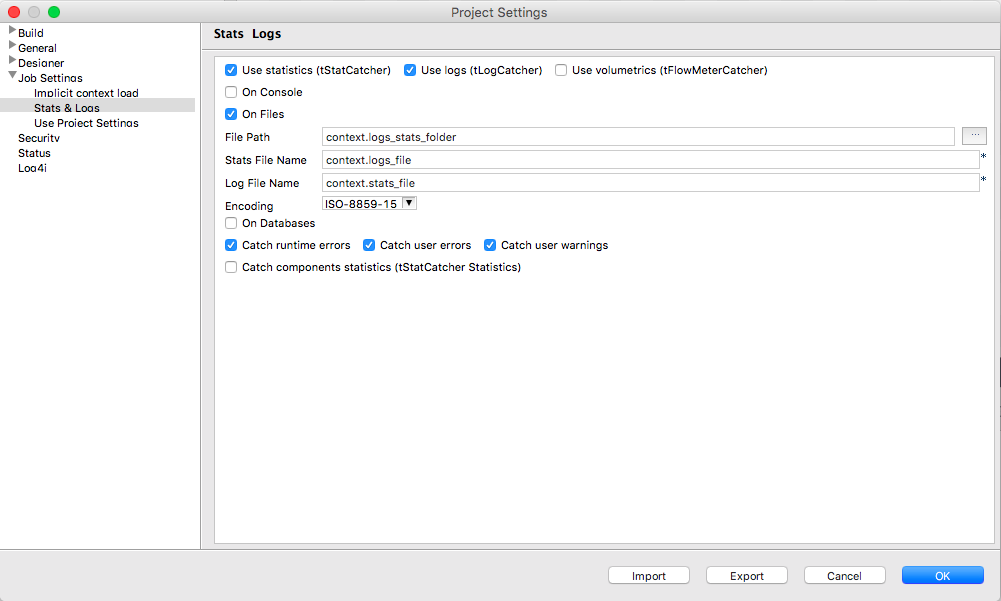
As you can see, I used context variables to fill out File Path, Stats File Name and Log File Name so it will be very easy to adapt to various environments.
#3 – Metadata
Handling metadata is super important. It will ease your work so much if you do it properly from the start. In this post, I focus on the metadata to connect to a database but the principle is pretty much the same for CSV files, and so on.
To set up metadata for a database, choose Metadata in the Repository panel. Right-click on Db Connections and select Create connection. This will open a new window. Pick a name for the connection. In general I use the following form: <environment>_<database>_<schema> (e.g., dev_finance_public).
After you clicked Next, you have to fill out the information about your database:

Hit the Check button to made sure the information you just filled are correct. Besides, it’s important to hit the Export as context button. It will generate a new context group (named dev_finance_public in our case). Finally, in the Repository panel, find the connection you just created, right-click on it and choose Retrieve Schema. As you can guess, it will retrieve the database schema. It will allow you to get schemas from the repository in your components. For instance, in a tPostgresqlInput component:
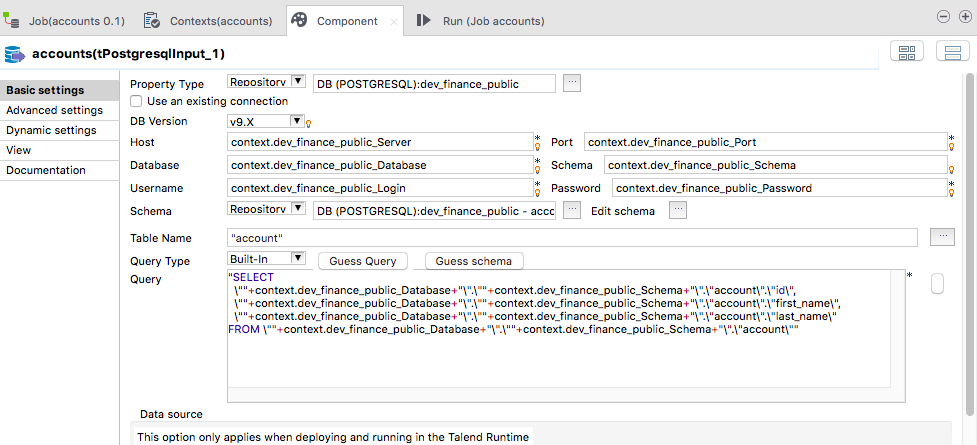
Notice that you no longer need to fill (again and again) the information related to your database (thanks to the context group) or to write the SQL query yourself: simply hit the Guess Query button (because the metadata was imported).
You will find additional information on TalendByExample.com, MindMajix.com and TalendTricks.com.
Conclusion
The best-practices presented here won’t seem concrete if you just started with Talend. But, they totally worth investing time to use them. It takes time at first, but it will save you some much time in the long run.